
Solar- Best Products
Ultimate Guide to Best RV Solar Panels, Kits & Systems


RV’ing and boondocking are fantastic applications for solar energy. It’s not a perfect power source, but the tradeoffs are more than likable. Components are easily available, simple to assemble and make clean, quiet and green power. You’ll enjoy having topped off batteries without the noise, odor and pollution.
Before we get started we just want to get it out there that any solar system is only as good as the sun. We highly recommend if you expect to be away from shore power for longer periods that you invest in a backup generator. Users reviewed the Yamaha EF2000iS highly. It’s compact, durable and built to last.
Okay okay, on to solar! This page is pretty hefty. In addition to the table below, here’s the rundown of what we’ll cover.
First we compare the best and highest rated RV solar panels and kits available. Then we’ll review basic terminology in the glossary, discuss energy audits in our sizing tutorial and finally cover installation tips, monitoring and maintenance tasks such as equalizing batteries, cleaning panels etc. Finally we’ve compiled some of the most practical real world cases for RV solar in the resource section in case you’d like some extra reading material. We’re always looking for more resources, if you have a favorite or wants your included, contact us!
QUICK NAVIGATION
- Compare RV Solar Panels & Kits
- The Best RV Solar Panel Kit
- RV Solar Panel Overview & Glossary: What You Need to Know
- RV Solar Energy Audit, Sizing Your System & Calculating Energy Needs
- RV Solar Video Gallery
- RV Solar Pros/Cons
- RV Solar Blogs & Other Helpful Websites
Compare RV Solar Panels and Kits
| Name | Watts | Amp Hours | # Panels | Rating | Price | |
| GoPower! Solar Extreme | 480w | 135Ah | 3x160w |  | Check PriceRead Review |
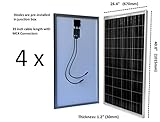
| Grape Solar 400 | 400w | 100Ah | 4x100w | | Check PriceRead Review |
| WindyNation 400 | 400w | 135Ah | 4x100w |  | Check PriceRead Review |
| Renogy 400 | 400w | 135Ah | 4x100w |  | Check PriceRead Review |
| Grape Solar 300 | 300w | 75Ah | 3x100w | | Check PriceRead Review |
| RENOGY MPPT Tracer 300 | 300w | ? | 3x100w | | Check PriceRead Review |
| RENOGY PWM Wanderer 300 | 300w | ? | 3x100w | | Check PriceRead Review |
| WindyNation 300 | 300w | 101Ah | 3x100w | | Check PriceRead Review |
| Grape Solar 200 | 200w | 50Ah | 2x100w | | Check PriceRead Review |
| Renogy 200 | 200w | ? | 2x100w | | Check PriceRead Review |
| WindyNation 200 | 200w | 67 | 2x100w |  | Check PriceRead Review |
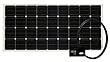
The Best RV Solar Panel Kit
This best RV solar panel award, hands down, goes to the GoPower! Solar Extreme 480w kit. This kit is complete, durable and more than adequate for the vast majority of RV’s even with extended stays without shore power and minimal reliance on a generator. Combined with a proven battery bank and proper conservation you’ll have enough power to run the essentials.
When the sun is in full force you’ll be even better. The included 3000w inverter will easily run most major appliances RV’s will have including the microwave, fridge, laptops, lights, fans, tv’s, vacuums etc. Some smaller 5000btu ac units will also work.
Note: A larger inverter and battery bank would be needed to run rooftop ac units, or connect the generator. 3 panels mean less space and less to install. The included 30 AMP charge controller will easily get the max current from your panels to your batteries for optimal charging.
RV Solar Panel Overview & Glossary: Things to Know
Types of Solar Panels
A solar panel (or a group of them, called an array) captures energy from sunlight and passes it through to the charge controller which is then feed at just the right current to your batteries for storage (think like a rain collector, but for sun!).
As photovoltaic (PV) technology continues to improve, the efficiency of this process is increasing. Many panels operate with a range of 10-15% efficiency. The latest technologies used in high end applications can reach 21% efficiency. This relatively low efficiency combined with unreliable sun exposure is the reason it takes many panels to create relatively small amounts of usable energy.
All solar cells are made from silicon. The purity and construction are what determine the efficiency and cost of the cell and therefore the panel.

Mono – Mono-crystalline solar panels have a characteristic “wafer” look. The silicon, which is the purest form available, is trimmed on four sides prior to being sliced into wafers to reduce cost of and increase efficiency of a panel. These panels often perform better than a poly-crystalline solar panel in partially shaded or low light conditions. They often cost more as the added purification process of the silicon is costly.
Poly – Poly-crystalline solar panels have a characteristic “blue” look. Also the cells are rectangular, not wafer, in appearance. This is because they aren’t trimmed like mono cells are. The crystalline structure isn’t as pure as a mono panel and therefore they offer slightly less efficiency for size compare to a mono panel. If you one panel a mono and another poly of the same size the poly would produce less output. Cost can be notably less though which makes poly panels favorable for large installations or those with a limited budget.

Thin Film (can be flexible) – Think film is a newer technology where silicon is applied to a substrate surface and reduces the cost even further, requiring less than 1% of the silicon of a same sized poly or mono panel. There is a trade off though in efficiency which dips down to 7-13% compared to the higher 15-20% of crystalline panels. Thin film is allowing solar to be integrated into many objects and the lower cost is making it attractive for larger installation where size isn’t an issue.
CIGS – (Copper Indium Gallium Selenide ) – This is a particular type of Thin Film solar array which produces considerable output compared to other Thin Film formats with efficiency nearing 10-12%. It also contains less cadmium, a toxic substance used in making panels. Applications using flexible formats make it ideal for applications not well suited to rigidity such as portable solar arrays and foldable or portable arrays.
Types and Purpose of a Charge Controller
Because the energy produced by panels has peaks and lows it it necessary to control the power entering the batteries to ensure optimal charging and to protect them from damage as well as maximize throughput. The controller performs this function and can handle many panels being attached to a single unit.
A controller does many additional function by understanding the charge state of your batteries and how to get the best charge with the available current from from your power source whether solar, generator or shore power. Using complex algorithms a solar specific charge controller works tirelessly to get every bit of power from your panels to your batteries for optimal charging.
Single phase: Single phase chargers have a single output and charge continuously at the same rate regardless of the charge condition of the battery. Often they charge at a high voltage the entire time they are connected. These are good when you need a short burst of current (amps) to get a dead battery up to charge quickly. They don’t do well fully topping off a battery. Once you remove the charge the battery doesn’t have time to absorb fully the current and once it drops back down to its static internal voltage it may be closer to 90% charged at best.
Single phase trickle: Trickle chargers also have a single output rate but usually it’s a much lower voltage such as the mid 13 volt range and slowly bring a battery up to full voltage. These chargers are common on rigs that often hook to shore power and simply need to keep batteries topped off, rarely charging them from a deep discharge. A trickle charger will do a superior job of getting a battery topped off as the lower voltage will help the battery full absorb the charge. The drawback is a trickle charger can take hours to charge a dead battery fully, which isn’t ideal when you have solar energy which comes in peaks or you need to use the generator to gives the batteries a boost. It takes forever and because they don’t charge at the higher voltage the battery doesn’t get “exercised” which can lead to “lot rot”.
Multi phase: Multi phase chargers are the best of both single phase and trickle chargers all in one with many added benefits such as complex logic to cycle batteries and adjust output based on the current being fed into them (solar currents vary wildly through a day depending on sun exposure, clouds, shade etc). A good multiphase controller that with solar logic will be able to open the current flow wide to get the batteries up to peak voltage quickly and then switch modes to absorb to help the battery get that last tiny bit of voltage store and finally hold the battery at full capacity. A solar multi phase charger is unique because it has more complex logic to handle the constant varying of current coming from the solar array and helps maximize the charging potential for the batteries.
Types of Batteries
Batteries are where you’ll actually store the power generated by the solar panels. Solar power is so sporadic that you simply couldn’t use it effectively straight from the panel itself. RV installations are a natural fit as they are designed to work on 12 volt systems. Often, the lighting and many appliances can operate at this voltage without any additional components.
In many cases, the batteries used for solar applications are actually 6 volt batteries instead of 12 volt. This means in order to create the necessary 12 volt circuit, a bit of wiring will be needed. It’s not complicated and once it’s assembled there is no need to make changes except when replacing the battery. Wiring two 6 volt batteries in series will create the needed 12 volts for your RV system to function properly. Wiring two batteries in parallel will double the amps.
Batteries are rated in Amp Hours. This means that the battery can put out a given amount of amps (current) for a given amount of time (hours).
Example: a 125 amp hour battery could put out 1 amp of current for 125 hours, or 125 amps for one hour. This isn’t entirely true as even deep cycle batteries can only be discharged to a maximum of 60%. So in truth a 125Ah battery could only put of max current, 125 amps for about 24 minutes before it is considered borderline damaged. Therefor, it is important to properly size your battery bank for the amount and duration of energy you’ll need. We talk about that more in our energy audit.

Flood/Wet: Flood cell batteries contain lead plates which are flooded with battery acid which stores the energy. These batteries can better withstand deeper discharging cycles, but are more prone to corrosion. When flood cell batteries aren’t cycled often they will build up corrosion on the lead plates reducing their effective available energy and can even short the battery out, rendering it useless. They also require more maintenance that the other types of batteries including equalization (process of charging the battery to a very high voltage above 15 volts to boil the fluid and cause the corrosion to flake off and fall to the bottom of the battery casing). Flood cells offer greater peak amp draw than the other types also.
Gel: Silica gel batteries contain a gel substance where the electrolyte is stored and allowed to pass between plates. What makes these batteries more difficult to work with is they have a very unique charing profile and require specific charger controllers and if an alternator is used it must have a special regulator. While less prone to spills or leaks give it more mounting options and make it excellent for areas with low ventilation. There is a trade off though. Gel cells aren’t as favorable for rapid discharge and often cost significantly more than a comparable AGM cell.
AGM: Absorbed gas mat contains a unique glass plate which allows the electrolyte to be wicked between plates. Like the Gel cell, it can be mounted in many different positions and if broken or tipped there is no available electrolyte to spill. AGM is preferred for rapid discharge and with the use of a quality charger can be brought back up to voltage quickly. AGM is a good candidate for deep cycling with discharge possible down to 60% without causing severe damage.
Types of Inverters

Energy stored in your batteries is accessible in two ways. Direct access is available for appliances designed to operate on 12v DC current. However, many appliances require 110v AC power (like in your house).
To convert the current in your batteries from DC to AC you’ll need an inverter. This device makes it possible to run your AC devices. These are rated in watt output.
A 1500 watt inverter can operate most small appliances requiring about 10amps AC current such a TV, coffee maker, laptop, computer, radio, lights, etc. To get more current you’ll need a higher wattage inverter.
The best solar panel kit we’ve reviewed comes paired with a 3000w inverter which creates a max available power of 30ams AC current which opens the door for many types of appliances such a vacuums, air conditioners.
Note that the type of inverter must be paired with a properly sized battery bank so as not to discharge the batteries too quickly. Also, the size of solar array is not affected by your inverter size. The solar array size should be chosen based on the amount of energy you’ll consume in a given day. An inverter needs to be sized on the max draw on your batteries at a given time such as how many things you’ll be powering at once.
How to Size Your RV Solar Panel System
Learning to speak power takes a little handy math. It’s not hard, but can be a bit confusing at first. We’ll cover the basics here to help you compute the amount of energy you’ll consume on an average day. This will help you determine the inverter size, battery bank size, solar charge controller size and finally solar panels to complete your system.
Conducting an Energy Audit
How to Calculate Energy
For discussion purposes we’ll use these formulas:
- watts=amps x volts
- volts=watts/amps
- amps=watts/volts
In electricity watts are watts, not matter if AC or DC, but Amps and Volts must be converted when changing currents from DC to AC and vice versa.
1000w AC is the same as 1000W DC
Convert AC amps to DC amps multiply by ten. 10 Amps AC is 100 Amps DC.
Convert DC amps to AC amps divide by ten. 100 Amps DC is 10 Amps AC
A couple examples:
- Hair dryers can use 1000w 110v AC. Convert the watts to AC amps. (watts/volts=amps) We get 9 AC amps. We can then convert those to DC amps by multiplying by 10. We get 90 DC amps. That’s a lot!

- A 27″ LCD tv uses 85w 110v AC. Convert watts to AC amps. (watts/volts=amps) We get .78 AC amps. Multiply by 10 to get DC amps and we have 7.8 DC amps.
- iPhone 6 uses 12w 110v AC to charge. Convert watts to AC amps. (watts/volts=amps) We get .109 AC amps. Multiple by 10 equals 1.09 DC amps.
How can I find the power usage of my appliances?
Using labels on appliances is the easiest way to determine how much energy they use when in operation. Google is pretty amazing too! Just enter the make and model of your appliance with the words “watt usage” at the end and see what you find!
This can be a tedious process, but is critical to properly sizing your system to carry your needs without always discharging batteries fully or spending more money and time than needed with a system that is over kill.
Calculating Your Energy Needs
Use this table concept to get a rough idea of your total amp hours needed in a given day. We’ll use this later to build your system out.
| Item | DC Amps | Hours of Use | Total Amp Hours |
| TV | 6.0 | 2 | 12Ah |
| Laptop | 4.8 | 6 | 28.8Ah |
| Lights | 8 | 2 | 16Ah |
| Water Pump | 2 | 2 | 4Ah |
| TOTAL | 103.3Ah |
Using this table we can see that we would need 103.5Ah of current to power all of these things as outlined. If you system has no charge current coming in (think cloudy day for solar etc) and we cannot let our batteries dip below 60% without doing extreme damage we would need a system that is 40% / 103Ah which is 258Ah. This is a minimum calculation though. Ideally you’d have plenty of reserve power so it’s wise to get as many Ah of current possible with the available space.
The battery bank we recommend has 4 225Ah 6V batteries, which when wired in series and then in parallel will result in a 450Ah 12v system. This means with the same current usage you’d only draw the batteries down to about 80%. Well within the safe zone for discharging. That’s on a day when you have no charging taking place also! So if you have charge current coming the surely this system will be more than adequate to handle the load I used as an example above.
Sizing an RV Inverter
Your inverter will need be able to meet maximum draw at a given time. This mean adding up all of the current being drawn at once from all the of the appliances which are powered on simultaneously. If you’ll be vacuuming with the lights on and your laptop charging you’ll need to know the entire current draw of these appliances to size your inverter. If your inverter is too small it you’ll will have to run less appliances at one time.
Sizing Your Charge Controller
Ideally your charge controller amp output rating is about 25% of the total Ah of your battery bank. For example, if you’re battery bank is capable of 450Ah of current you’d like to find a charge controller which can output 112.5Ah of current. This is a bit high for most RV applications as you won’t have an array that can produce that much current. Why does this matter? If your charge controller is too small then it’s a bottle neck of the energy coming in from your charge source (solar). If your panels can produce 35 amps, but your controller can only handle 20, then you’re wasting potential charging power. For example we recommend this Outback Power FLEXmax 60 charge controller for 400-800 watt rv solar systems. It can easily handle all of the output of your panels and will feed all that juice to your batteries.
Many of the solar kits we recommend come packaged with smaller 30-35 amp charge controllers which are adequate to handle moderate current needs, but for someone with heavy current demands they aren’t up to the task. You’ll need a larger array (perhaps as high as 800 watt) and with it a larger charge controller (60-80 amp). Planning ahead is wise so if you think you’ll be expanding your system in the future it’s wise to buy accordingly.
So for our application let’s suppose we chose the Outback Power FLEXmax 60. This will help us size our array.
Sizing Your RV Solar Panel Array
Sizing your array is based on both your energy needs which we determined during our energy audit which helped us size our battery bank which we used to size our charge controller and now we’ll use that to size our array. Our Outback FLEXmax 60 can handle 750 watts at 12v DC. Our rv solar kits above are in the 480 watt range. If we used an array such as this with 3 160 watt panels we’d still have room to add another panel or two later to get even more wattage without having to upgrade the other components in our system. 480 + 320 = 800 watts max output of the array. More than enough to keep our controller pushing max current for storage.
Helpful RV Solar Videos
Pros and Cons of RV Solar Kits
Using solar energy while traveling has benefits and drawbacks so let’s consider some of the pros and cons of green energy kits that are a good fit for RV’ing.
Pros
- Freedom
- Quiet, works 24/7
- No risk of burns or chemicals
- No stinky odors
- Low maintenance
- Long lifespan
Cons
- Sporadic outputs can be unpredictable
- Limited space for arrays and battery banks
- Initial cost is higher
- Requires installation


